The school year is coming to an end. My daughter has some really great teachers at her preschool. She loves them. So we wanted to do something to thank them. We made some cards using a wine cork stamping technique I had seen on
this blog. We actually found a wine cork on the road when I had taken the daughter out to ride her bicycle around the apartment complex.
I put blobs of a few colors (blue, red, yellow and white) on a plastic container lid. The daughter swirled the wine cork around and picked up random colors and stamped a circle to make the flowers. I had drawn a circle on the paper to help her understand where to stamp. I also drew a few leaf shapes on the paper and she painted them green. I used tempera paints. When the paint was dry, I cut out the flowers and leaves leaving a tiny border of the plain yellow paper around it.
I let the daughter stick the flowers and leaves on craft paper folded into cards. She put a dab of glue on the flowers and leaves and stuck them to the cards. The flowers and leaves stand out a little on the card because the glue is not spread all over but just a dab in the middle or wherever the daughter put it. :) I let her stick them where she wanted and so every card looks unique.
I thought the flowers and leaves needed some brightness so I dipped the back of a paint brush in some white paint and made some dots in the center and some lines on the petals. It ended up making the flowers look so much better. I also made some lines on the leaves with yellow paint.
Fabric Bookmarks
We also made some fabric bookmarks for the teachers. I had an old night gown with a beautiful color and print, which I used for the bookmarks. For the base, I used a thin cardboard which used to be a food package box. I bought a ribbon matching the fabric and used some white star shaped beads I already had.
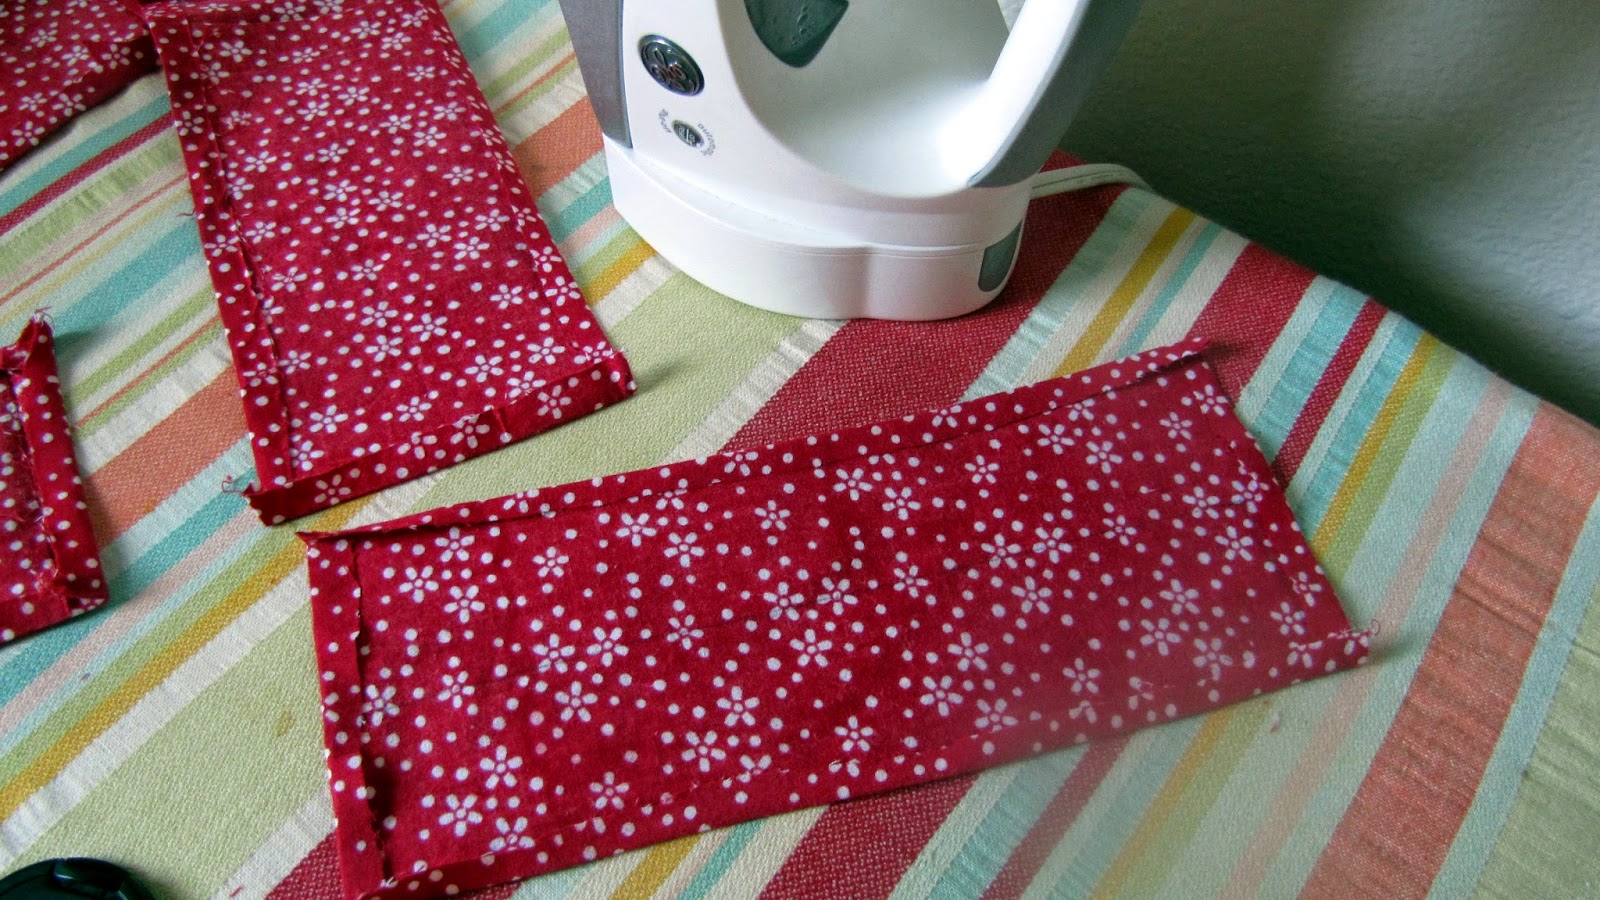
I cut the cardboard into strips 1.5 inch x 9 inch. I cut the fabric into rectangles 3.5 x 10.5 inch. I folded all the edges in about a centimeter in and ironed them. I wanted to make the edges strong to avoid tearing the fabric. I also threaded the ribbon into the beads and created a loop to top the bookmark.
The husband stitched three sides of fabric rectangle, formed by folding the fabric in half to match the size of the cardboard strips. I then slipped the cardboard strip into the rectangle.
I placed the ribbon loop in the open side. The husband then stitched a decorative stitch on the top edge.
The finished bookmark :)
 I put blobs of a few colors (blue, red, yellow and white) on a plastic container lid. The daughter swirled the wine cork around and picked up random colors and stamped a circle to make the flowers. I had drawn a circle on the paper to help her understand where to stamp. I also drew a few leaf shapes on the paper and she painted them green. I used tempera paints. When the paint was dry, I cut out the flowers and leaves leaving a tiny border of the plain yellow paper around it.
  I let the daughter stick the flowers and leaves on craft paper folded into cards. She put a dab of glue on the flowers and leaves and stuck them to the cards. The flowers and leaves stand out a little on the card because the glue is not spread all over but just a dab in the middle or wherever the daughter put it. :) I let her stick them where she wanted and so every card looks unique.
  I thought the flowers and leaves needed some brightness so I dipped the back of a paint brush in some white paint and made some dots in the center and some lines on the petals. It ended up making the flowers look so much better. I also made some lines on the leaves with yellow paint.
 I cut the cardboard into strips 1.5 inch x 9 inch. I cut the fabric into rectangles 3.5 x 10.5 inch. I folded all the edges in about a centimeter in and ironed them. I wanted to make the edges strong to avoid tearing the fabric. I also threaded the ribbon into the beads and created a loop to top the bookmark.
 I placed the ribbon loop in the open side. The husband then stitched a decorative stitch on the top edge.
 The finished bookmark :)


Comments
Post a Comment
I really appreciate your feedback! Thank you!